On April 8, 2024, the sun, moon, and Earth will perfectly align, causing a solar eclipse. Want to teach your students about the Great American Eclipse and help them safely view this exciting event? Read on to find out how to make a solar eclipse viewer with just a few simple materials, and fill out the form on this page to grab our free student recording sheet.
Jump to:
Explaining the Great American Eclipse
Here’s how to explain the Great American Eclipse to your students.
There are two different types of eclipses: a solar eclipse and a lunar eclipse.
Throughout the year, the moon is continuously orbiting the Earth, and the Earth is orbiting the sun. A solar eclipse happens when the moon passes in front of the sun, blocking the sun’s light from Earth.
A lunar eclipse happens when there is a full moon. The Earth lines up perfectly between the moon and the sun. Meanwhile, Earth’s shadow appears on the moon. This amazing event happens during the night and is safe to look at without an eclipse viewer.
The solar eclipse happening on April 8 is called the Great American Eclipse because it can be viewed from Canada, the United States, and Mexico.
How a Solar Eclipse Viewer Works
When viewing the Great American Eclipse on April 8, it’s important to avoid looking directly at the sun. (Looking directly at the sun isn’t very safe anytime of year anyway!). Solar eclipses shouldn’t be viewed with the naked eye or through camera lenses, phones, or telescopes. However, solar eclipse viewers and special solar eclipse glasses allow us to look at the event safely and experience science in action.
Solar eclipse glasses can be purchased from a variety of vendors. These types of glasses are different from traditional sunglasses. Solar eclipse glasses have a special material that blocks out ultraviolet and infrared light.
You can also make a DIY solar eclipse viewer using the simple materials and directions described below. The device allows the sunlight to enter the pinhole and make a small circle of light inside. As the eclipse happens, a shadow is made over the light seen inside of the box. See below for step-by-step instructions, or check out this video.
Materials Needed
To create a solar eclipse viewer, gather the following materials:
- A box with a lid (shoeboxes or cereal boxes work well)
- 1 thumbtack or pushpin
- Scissors or box cutter
- White paper
- Aluminum foil
- Marker
- Black construction paper (optional)
Steps To Make a Solar Eclipse Viewer
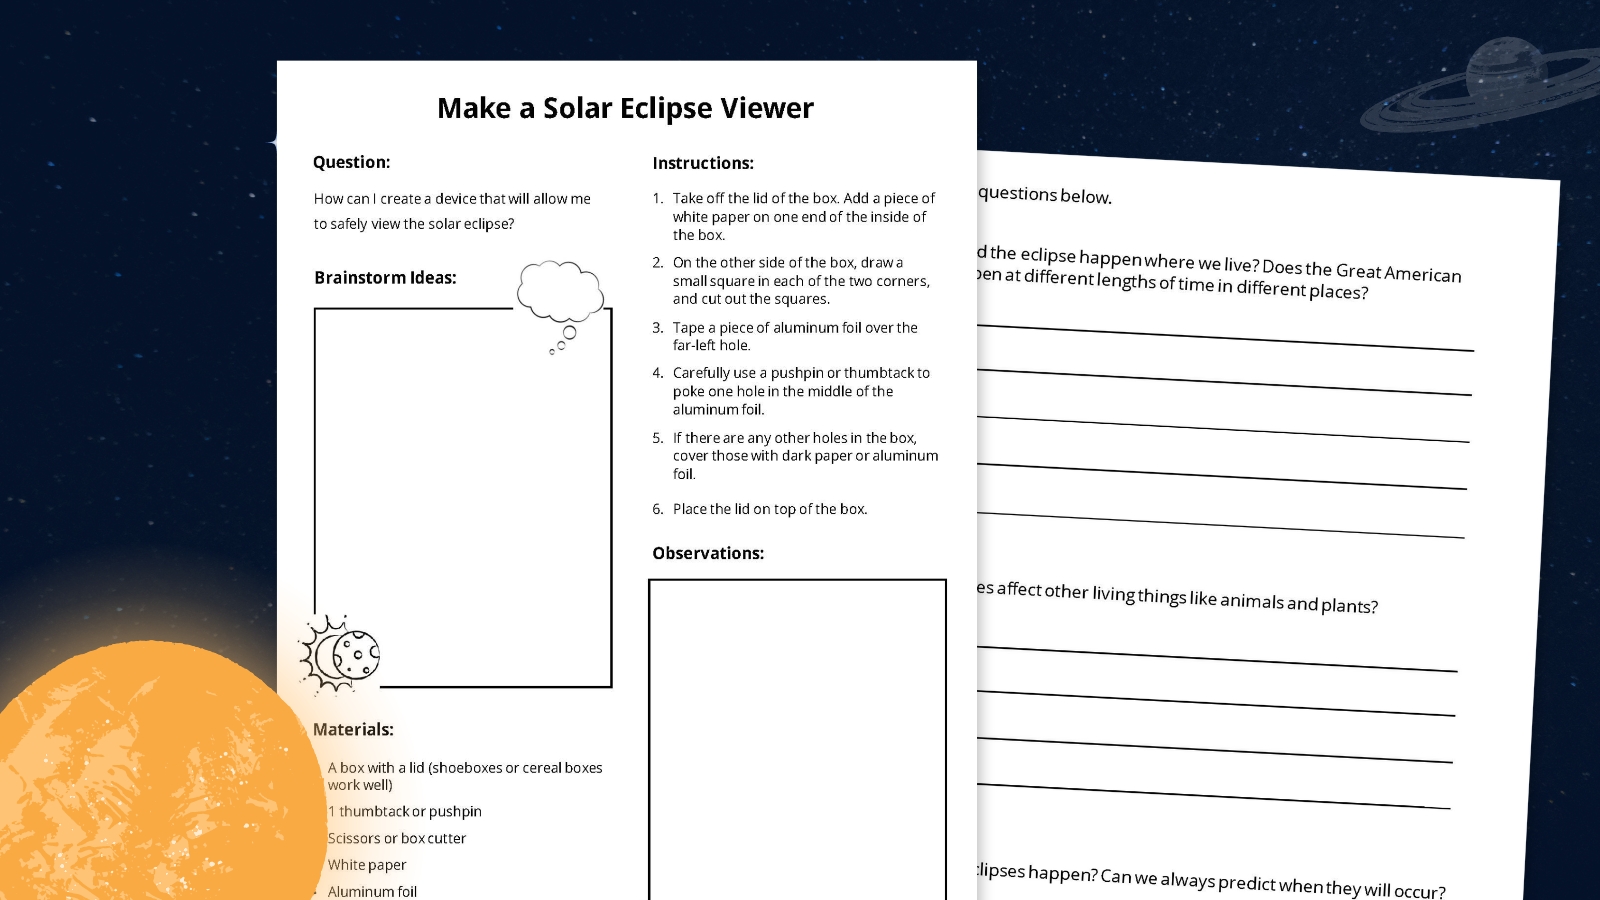
1. Take off the lid of the box. Add a piece of white paper on one end of the inside of the box. This will allow the light to be more easily seen.

2. On the other side of the box, draw a small square in each of the two corners. Cut out the squares. (Make sure a grown-up helps with this.)

3. Tape a piece of aluminum foil over the far-left hole.
4. Use a pushpin to carefully poke one tiny hole in the middle of the aluminum foil. (Be sure to ask a grown-up for help.)

5. If there are any other holes in the box, cover those with dark paper or aluminum foil.

6. Place the lid on top of the box.

Grab our free solar eclipse viewer worksheet!

Fill out the form on this page to get your worksheet. The worksheet asks kids to guess the correct order of the steps in the experiment. Next, kids must make a prediction about what they think will happen. They can use the provided spaces to draw what they see. Did their predictions come true?
Using the Device To View the Eclipse

Once the solar eclipse viewer is assembled, place the lid on the box and hold the device with the holes facing toward you. Without covering the pinhole in the aluminum foil, position yourself with your back to the sun and peer through the hole without foil.
Rotate the box to allow sunlight to enter the pinhole. Inside, a circle of light will project onto the white paper inside the box.
As the eclipse moves, observe the shadow forming on the circle of light within the box.
Additional Reflection Questions
1. How long did the eclipse happen where we live? Does the Great American Eclipse happen for different lengths of time in different places?
2. How do eclipses affect other living things like animals and plants?
3. How often do eclipses happen? Can we always predict when they will occur?