Want an activity that will have your students blooming in your classroom? Elementary school is the perfect time to nurture the inner artist that lives in every child. What better way than to encourage them to learn to draw something beautiful like a rose? Our free printable has step-by-step instructions for teaching kids how to draw a rose. Make it a fun Friday group activity or keep it on hand for your fast finishers!
There’s a video tutorial and images with step-by-step instructions. Plus, be sure to download the free printable instructions so kids can easily follow along.
How To Draw a Rose Video
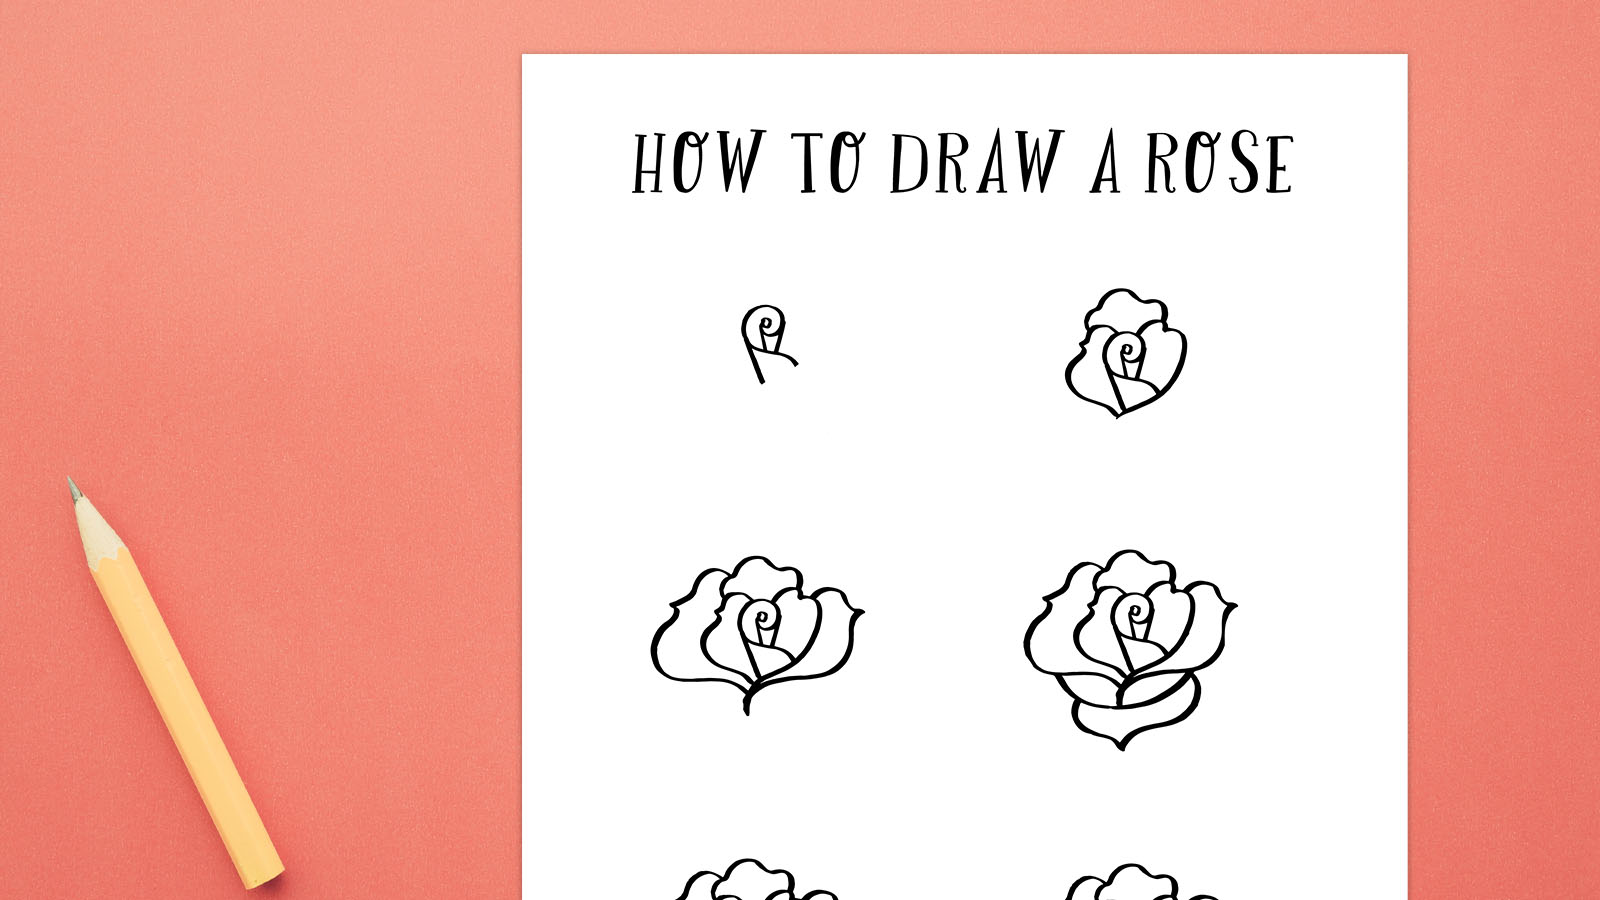
There are six easy-to-follow steps below for teaching kids how to draw a rose. They should simplify the process for kids of all ages and abilities.
How To Draw a Rose Step-by-Step
Step 1
Start with your marker in the very center of the page and then make a small swirl. The bottom of it should actually look like an upside down Y with a swirly tail. Finally, draw a short line straight down from the right edge of the swirl and another just under the center point of the swirl.
Step 2
Now you’re going to draw two almost heart-like shapes coming off of either side of the center of the rose. Then, you’re going to draw a cloud-like shape across the top.
Step 3
Now we’re going to build upon the existing rose shape. Add two shapes on either side. These shapes should loop out, come to a point, and then loop back down to the bottom where they meet.
Step 4
We’re going to flush the rose shape out a bit more in this step. Draw an upside-down half-moon shape where the middle meets the point you created at the bottom in the last step. Finally add another shape coming off of the last one. It should come to a downward-facing point.
Step 5
It’s now time to continue adding petals to our rose and really bring it to life! Add another petal to the left and right sides. Then, add another bottom petal that connects the two petals that you just created.
Step 6
With the petals complete, it’s now time to add some leaves. You can add about four leaves, two on each of the sides. Draw them in slightly different sizes and shapes for a more realistic effect. Once drawn, add a line down the middle of each with a few smaller lines coming off of it. You can also add some short lines inside some of the petals for a finishing touch. Finally, color with your medium of choice.
Get your free How To Draw a Rose printable with step-by-step instructions!
Are you ready to save and print your free rose-drawing printable? All you need to do is click the button below to fill out the form at the top of this page.